Showing posts with label Cookies. Show all posts

Congo Bars

Umm yes, that is me in the purple sweater and yes, that is Bakerella!  I know, I can hardly believe it myself... I got to sit next to her!  Oh my gosh.  She even signed my Cake Pops book!  Oh my gosh.  


Turns out, she not only rocks at making amazing sweet treats - she's even a sweet gal in person.  


So this week I decided, in honor of finally meeting Bakerella in person, I would indulge in one of her very own recipes.  Congo Bars to be exact.  It's kind of like combining a brownie with a cookie and then taking the level of amazing x10


Here's my rendition of Bakerella's Congo Bars...

Congo Bars
2 3/4 c. flour
2 1/2 t. baking powder
1/2 t. salt 
4 T. cocoa powder 
2/3 c. butter (softened) 
1 lb. light brown sugar
3 eggs
1 t. vanilla
11.5 oz. package chocolate chips (I used dark chocolate chunks)
Powdered sugar for garnishing

1.) Prepare a 13x9 inch pan and preheat oven to 350 degrees Fahrenheit.  
2.) Mix flour, baking powder, salt and cocoa powder in a large bowl. Set aside.
2.) In a separate bowl, beat butter and sugar together until light and fluffy.
3.) Add room-temperature eggs, one at a time to sugar mixture.  
4.) Add vanilla and continue to blend on low.
5.) On low, add flour and mix only until combined.
6.) Stir in chocolate chips.  Spread batter into pan.  
7.) Bake at 350 degrees Fahrenheit for 30-35 minutes or until inserted toothpick comes out clean.  
8.) Sprinkle with powdered sugar.  

Happy Baking!


Healthy Cookie Secrets!

Yep, you read it... healthy cookies. Oh yeah, I went there! I recommend you read this with a bit 'o optimism... I promise you'll be surprised!


These are very tasty and will hit your sweet tooth on the head without spoiling your whole day of healthy eating. What's better yet, is that when I put this recipe together, I did it with the intention of making it kid-friendly.

You know how sometimes kids demand something they shouldn't have? They are certain that living off Nilla Wafers and Oreos is totally doable and that they aren't going to be happy until you allow them to fulfill their dreams of a cookie-only diet. They pull your hair, hold their breath, tell people in the grocery store that they don't actually know you, and leave you wishing they were still young enough to take a pacifier.

Well... hopefully the recipe I am providing you with will help maintain your sanity and keep your little tikes healthy (but lets keep the fact that these are healthy cookies between just you and me).

So basically my goal was to disguise these little miracles as cookies while keeping the fat and calories down, yet including some healthful nutritional aspects (such as potassium, whole grains, protein, thiamin, and magnesium) ...so you're not left with an "empty calorie" snack.


Healthy Cookie Secrets
Ingredients:
1/2 cup butter (unsalted and at room temperature)
1/2 cup honey
1 egg
1 cup mashed super-ripe banana or applesauce (or you may opt to use 1/2 cup of each - keep in mind that the cookies will be fluffier with banana and denser with applesauce)
1 cup rolled oats
1-1/2 cups multi-grain flour (or whole-wheat, but multi-grain is arguably healthier)
1/4 cup oat bran (or wheat germ, flax seed, or a mix of the three)
1/2 teaspoon baking powder
1/2 teaspoon baking soda
1/8 teaspoon sea salt
3/4 teaspoon cinnamon (optional)
1/4 teaspoon nutmeg (optional)

*I also mixed in sliced/toasted almonds, raisins and craisins - all combined to equal 1 cup. Feel free to play around with this part though... if you are in need of a small chocolate fix, add a small handful of chocolate chips, at least these will calm that craving before you attack the carton if ice cream in the freezer, right?

Instructions:
1. Preheat oven to 400 and grease 2 cookie sheets.
2. Cream butter and honey together, add egg. Mix in banana (and/or applesauce) and oats.
3. Combine remaining dry ingredients in separate bowl. Mix dry ingredients into butter/honey mixture. Hand stir nuts, dried fruit, etc. into batter.
4. Drop by spoonful onto prepared cookie sheets and bake for 12 minutes in preheated oven.


P.S. I recommend crumbling these cookies into your yogurt for a healthy, protein-rich lunch. I love using The Greek Gods Greek Yogurt (Honey Flavor), it's seriously delicious and is filled with loads of calcium and protein.

Happy healthy snacking!

(Thank you Christina and Nora in Madison, WI for requesting a healthy cookie recipe!)

Heirloom Chocolate Chip (or M&M) Cookies


These cookies are quite delicious. I have some larger baking projects up my sleeve (mua ha ha ha ha!) so while I am brainstorming and gathering all the tools I need to complete these projects, I have decided to take a break for these classicly yummy M&M Cookies!

This is what I would call an heirloom recipe. This recipe has been in my friend's family for generations - no one really knows what generation it first started in however. The first time I tried a cookie from this recipe, I was probably no more than 10 years old and was at my friend's house for a sleepover. In the morning I woke up to these wonderful cookies and was given a bag of them to take home to my family. After my mom had a taste of these little yummies, she managed to get a copy of the recipe. Yay!

So here I am sharing the original recipe with you. Originally, the recipe called for mini chocolate chips (not M&Ms as I have done - but I sometimes like a little rainbow in my cookies!). The cookies will turn out very soft and chewy - perfect for a tall glass of milk! I recommend making the traditional recipe, but feel free to substitute the chocolate chips for M&Ms, walnuts, mini peanut butter cups, etc.

Heirloom Chocolate Chip Cookie Recipe

1/2 cup granulated white sugar
1/2 cup brown sugar
1/3 cup butter (unsalted and at room temperature)
1/3 cup crisoco (or more butter)
1 egg
1 teaspoon vanilla
1-1/2 cups all-purpose flour
1/2 teaspoon baking soda
1/2 teaspoon salt
1 package mini chocolate chips

1. Cream together: white granulated sugar, brown sugar, and 1/3 cup butter. Add Crisco (or another 1/3 cup butter) and cream together for one minute.
2. With mixer on low, beat in egg, vanilla, baking soda, and salt.
3. With mixer still on low, slowly pour flour into batter, mixing just until ingredients are combined.
4. Fold chocolate chips into dough using a spatula.
5. Bake at 350° for 12-14 minutes.

Ladybugs and Flower Power

Outlining and flooding sugar cookies with royal icing was the task of this week. I am finally finishing my last two weeks of college so have postponed the fondant until I graduate (May 22, wahoo!).

If you want cleanly detailed cookies, royal icing is the best way to go. For those of you who have only had the pleasure of eating royal icing: meringue (i.e. egg whites) is one of the main ingredients. As with any recipe where raw eggs are used, there is always the risk of salmonella so meringue powder is often recommended, particularly if cooking for a large crowd where older adults and children may be present. The down side to meringue powder however is the flavor. There is this rich, sweet taste to royal icing when you use real egg whites and the texture is soft and creamy. Not that meringue powder tastes terrible, but there's no doubting the deliciousness of fresh, from-scratch ingredients.

Speaking of from-scratch ingredients, my garden seedlings are anxious to get into the ground and I am anxious to dig in the dirt. Three more weeks before the soil will be ready for me though so until then, creating a sweet bouquet of flowers must remain strictly kitchen business...


With my college commencement rapidly approaching, the campus has been springing to life as the grounds crew grooms the campus to perfection. There are so many flowers blooming on campus that you don't even have to bend towards a blossom to smell the sweetness, this is definitely my favorite time of the year.

There is a cute little kitchen supply store here in Decorah, Iowa called Ace the Kitchen Place. In fact, it's the only kitchen supply store in little Decorah... and they have one of the best collections of cookie cutters I have ever seen. Just to give you an idea of how extravagant some of the cookie cutters at this place are, I will simply tell you that recently, at a friend's wedding, one of the gifts just so happened to resemble one of her favorite animals... it was a goat cookie cutter!

Not that I'm making any goat cookies here, but I did find a fun design do go with my flowers...


Ladybugs! ...and no, these are NOT those pesky, stinky Asian Lady Beetles, these are Ladybugs... big difference.

So outlining and flooding...
this refers to a process where you start with a stiff royal icing and pipe an outline for each color you are going to use on the cookie. After you have outlined the border for each color on the cookie and there are no holes in the outline, you thin the royal icing and "flood" each compartment with it's respectful color.


I was originally going to make a sunflower but in the end, couldn't bring myself to do it - sunflowers and I have a bad relationship at the moment. You see, a couple months ago I planted some little seedlings that will eventually go into my garden. These seedlings are currently in one of the campus greenhouses. Because these seedlings are not for a research project or anything directly beneficial to the college, I was given permission to use the greenhouse only if I kept my little seedlings on the floor. This was fine with me however little did I know, one of the professors has been performing a research study on sunflowers. It's quite pretty actually, the entire greenhouse is filled with sunflowers and my little seedlings are lying beneath them (and still getting plenty of light). I began to notice little splotches on my seedlings' leaves however - the kind of splotches that typically develop where herbicide or a strong fertilizer is spilled. I can only assume that the sunflowers my poor little seedlings used to be under, were being given some sort of fertilizer treatment and while I do not have any direct evidence of this, I do know that those sunflowers are going to be guilty until proven innocent! (pounding fist on desk)

But enough about my seedlings, I am sure that you will hear more about them soon enough as I expect I will have them in the ground within the next three weeks and will have stories and organic gardening tips for you then.


The lady bugs were rushed so they didn't turn out as nicely as the flowers. See the ladybug's dots? When forming flat dots, you place the black dots on the red icing before it completely sets. It is good to wait about 30-45 seconds between flooding and placing your dots. If you try to put the dots on too soon, the two colors will bleed - you can see this by looking at the ladybug above. The black and red on the left wing bled together while the dots on the right were perfect.

Also, it is important that you don't mix the royal icing too much - there needs to be a happy medium. Not enough mixing and you won''t form the nice stiff peaks necessary for the proper texture and shiny look, but if you mix too much (as I did with the red), you will have a soft, spongy royal icing that appears slightly bubbly (i.e. not smooth and shiny) and never properly sets.


For those of you who have read this far down... the two most important rules when making sugar cookies are that you:
  1. Keep it thick - don't roll the dough too thin, when have you ever eaten a cookie and said, "mmm... I love how skinny and tiny this cookie is"...?
  2. Use real ingredients whenever possible, there is no question that making something from scratch using fresh, unprocessed ingredients is going to taste better.

Lastly, my Royal Icing Recipe uses real egg whites and covers roughly two dozen cookies:

Ingredients:
2 egg whites
1 t. vanilla (if you want white icing, either omit the vanilla or use clear white vanilla extract)
4 c. powdered sugar

How-To:
1.) Beat egg whites and vanilla until foamy.
2.) Add powdered sugar gradually until shiny.
3.) Beat until mixture forms stiff peaks.

Note: A good way to make sure that your peaks are stiff enough is by dipping a spatula into the mixture and pulling it out to form a peak. Then wiggle the bowl slightly - if the tip of the peak falls over, keep beating but if the tip of the peak stays pointing straight up, you're good to go!

The Three Rules of Eating in the Twin Cities

Who loves scrumptious cupcakes, cookies and cake?! How about ice cream?! Local meat?! Yep, that's what I thought. Mee too!

Now that I have been living in the twin cities area for a little over a year, I have discovered a couple rules to eating well...

Rule number one: If you want local meat (which is the only kind of meat you will ever see me eat), Clancey's is the place to go. Located in Linden Hills near the quaint little coop and a Great Harvest, this is a fun place to go for an afternoon (or day!) of good eats. Not only does this place bring in fresh, local meat but everything is seasoned in store with some of the most mouth-watering concoctions you can imagine. Some of the best in my book are: pork sirloin with mustard and fennel seed and German-style bratwursts; then there's beef seasoned with blue cheese and green onion, mushroom and swiss, or even bacon and cheddar. This place even has a rotating menu and makes sandwiches on the spot so you can have a hardy lunch while picking up meat for later. (Image courtesy of Heavy Table)

Katie Cannon / Heavy Table

Rule number two: If you want ice cream, either convince my boyfriend to share some of his homemade ice cream with you or take yourself over to the Grand Ole Creamery on Grand Avenue. If you haven't been to Grand Avenue, then I suggest you take yourself there the next warm sunny day! There are tons of cute little specialty shops lining the street, with the Grand Ole Creamery on one end. You'll know when you're getting close to this place though because you'll smell their made-from-scratch sugar waffle cones on the waffle iron (my favorite part!). The awesome factor gets kicked up a notch when you go to take that last bite of your cone - there's always a little whopper in the bottom of your cone to keep the ice cream from running out if there's a tiny hole. I like to call this the ice cream cone hole-plugger! (Image courtesy of CBS Minnesota)


Rule number three: The absolute best place to get lunch, dinner, and dessert in the twin cities is at Yum! This place has the most amazing veggie sandwich I have ever had (and I've had my fair share of veggie sandwich concoctions!). I know it's basic, but this sandwich is just so darn good when you are sitting in the dinning area and you know that after you finish your amazing sandwich, you are going to go over and pick out an amazing cupcake... or cookie... or cake... or all of the above! There is also a full-service coffee bar here which makes things even better. I have yet to visit this restaurant in the morning, but it's definitely on my to-do list once I graduate.

This first cupcake is a moist chocolate with angel fluff filling and a fudge layer of chocolate amazingness on top...


Next was my boyfriend's pick - a ginormous cookie... wait no, TWO ginormous cookies with what I think was a buttercream filling inside? Can't be too sure... that one disappeared too fast. P.s. this picture does NOT do justice to the size of these cookies - they were larger than my hand!


...and last but by all means, NOT least (drum-roll)... the moistest chocolate cupcake EVER with an incredibly fluffy raspberry fluff on top (so jealous... if only my fluffs were so fluffy!). Oh, and let's not forget about the fresh raspberry on top!


Yum indeed! During my most recent visit I also had a lemon meringue cupcake - a vanilla cupcake with lemon meringue filling, lemon buttercream fluff, and a lemon-head candy as the cherry on top. As you can see by the lack of a photo for that one... I ate it without thinking to take a picture. I could not resist!

Now that I have shared my favorite places to get the goods, I want to know where your favorite place is to fix that sweet tooth, have a veggie sandwich, or to just get some all-around good eats!
What is your favorite eatery?


Little Chocolate Reminders

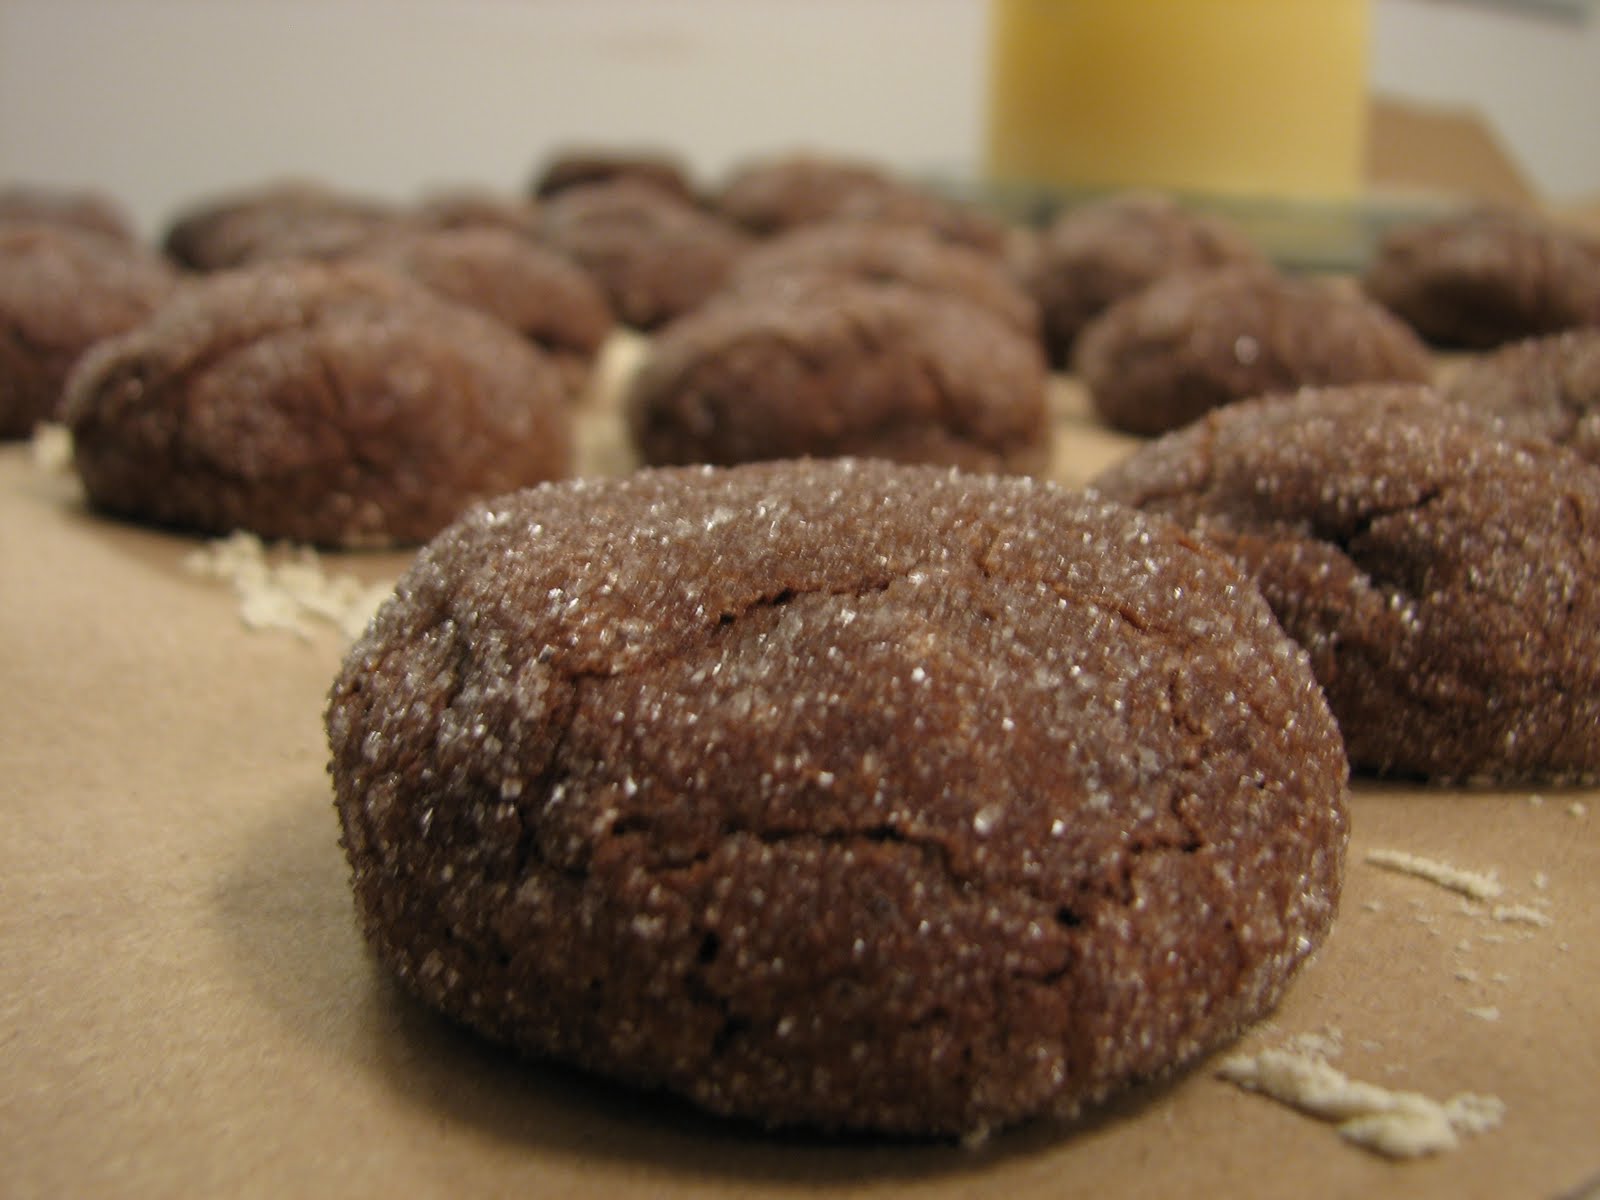
After a recent visit to my college town and a night with one of my best friends, I have regained sight of my goals and fantasies. Having strayed so far from the path of where I was going with this blog and now returning to that path, I am able to reflect on why it is that I love baking so much. Last night I found myself exhausted, aching from a cold that has turned into a lung infection, and lost somewhere between a cloud of flour and the frenzy of bubbling chocolate and butter. Pulling the first batch of Chocolate Crackletops from the 350 degree F oven, I felt renewed with energy. Although this energy may have been resulting from the dense sugar-laden chocolate batter I had been licking off the blender, I was nonetheless excited and anxious to again share my passion of baking with others. So now, if simply baking a Chocolate Crackletop can renew my motivation, then imagine what eating one can do for others. With that, I wish to share a recipe with you...

Chocolate Crackletops
  • 2 cups flour
  • 2 teaspoons baking powder
  • 2 cups sugar
  • 1/2 cups butter
  • 4 ounces unsweetened baking chocolate (chopped)
  • 4 eggs (beaten)
  • 2 teaspoons vanilla
  • 2 cups M+M's (mini) or chocolate chunks... play around with this part, but I recommend the M+M's for your first try.
  • additional sugar for coating
  1. Combine flour and baking powder in large mixing bowl, set aside.
  2. In large saucepan over low heat, combine 2 cups sugar, butter, and baking chocolate. Stir until melted and remove from heat. (Remember to take your time when melting chocolate)
  3. Gradually stir in beaten eggs and vanilla.
  4. Stir saucepan mixture into flour mixture until well blended.
  5. Chill for 1 hour.
  6. Stir in M+M's, chill for one more hour.
  7. Roll into 1 inch balls, roll in bowl of sugar.
  8. Bake 2 inches apart on well greased and floured pan.
  9. DO NOT OVER BAKE, these will come out very soft so be careful when removing from pan.
  10. Bake at 350 degrees F for 10-12 minutes.
  11. Pour yourself a cup of Java, take a deep breath and savor your creation.
Chocolate Crackletops (using chocolate chunks)